In the world of electronic devices, Apple is the leading industry for years now. It holds a large portion of the mobile market and with every new launch, it just creates a fuss in the whole digital-electronics market.
Since it holds such a big share in the market; every client wants their app to work on iOS. Therefore, iOS app development is booming day by day.
As Apple is renowned so you might be thinking that there is some rocket science but no, iOS development is not at all hard.
And, this post will act as a comprehensive guide to all the process of developing the application for the iPhone.
We’ll be focusing on the phases, reasons, and tools for iOS app development, and finally, with an easy code tutorial, we will develop a basic iOS app using the Xcode.
Note: You will need a Macintosh Operating System (Mac OS) computer system for Xcode installation, application development, and app submission.
But first let’s us know about the basics such as iOS itself.
What is iOS?
iOS is an operating system which powers all devices developed by Apple. such as iPhone, iPod Touch, and iPad. So, if you are developing an iOS app then it would be compatible with all the devices running on iOS.
This makes the above feature even beneficial because it saves a lot of coding work.
Also, the same programming language is used for all of Apple’s computing devices apps. This clearly clarifies the fact that the developed app can later be integrated on to other iOS devices such as iPad and Mac.
The core programming language, Objective-C, powers all of their frameworks. Other than Objective-C, you can also develop an iOS app with the Cocoa Touch (UI framework used for developing iOS apps).
Let’s have a look on the phases of iOS app development.
Planning iOS App Structure
While creating an iPhone app you need to know the phases of iOS app development.
Planning is the first and foremost phase of any long run process. So here too, first of all, we have to plan what will be the motive of the app.
What is that reason that people will download your app? What features it should include?
Once you are through this process then, you are going to save yourself from a lot of hassles in the coding phase.
While you can think about the views like different pages in a website and each view offering different functionality e.g, a login form, a list of contacts, or a table of data.
So, here we are mentioning the different UI bar elements:
- Status Bar – It displays the battery level of the device, bars of reception, 3G connection, phone carrier, and a lot more things.
- Navigation Bar – It gives users the option to navigate between hierarchies of the pages, includes a button on the left side which enabling the user to return back to the previous page.
- Toolbar – Generally, it appears at the bottom of the iOS app, holding a few icons offering some functions such as download, share, delete, etc.
- Tab Bar – It is similar to the toolbar, the difference is only that you work with tabs. When a tab is clicked by the user it gets automatically be highlighted with glossy hover state. Instead of offering direct functionality, it switches between views.
Designing Photoshop Mockups
Photoshop is the premiere software for creating, logos website graphics, blog banners, and mobile mockups. Designing graphics for iPhone app is a bit complex process. But, here we are trying to simplify this Photoshop process.
- Begin with Photoshop settings for iPhone; traditionally, the icons are marked with @2x at the end of the file’s name i.e “[email protected]“.
- Optimize the new document settings; firstly edit some preferences; Photoshop > Edit > Preferences > Guides, Grid, and Slices.
- Set the gridline every 20px with subdivisions at 2. If you are designing for retina display then, the 2px line will be displayed 1 point on the screen.
It is always easy to build designs with higher resolution then scale them down, though both methods can be used. Here, we’re using 640 x 960 pixels at 326ppi, you can also save it as a custom preset if you’ll use it frequently.
Creating Layout with Template Elements
Now, use Photoshop to develop a pixel-perfect layout on your own, but remember this can to be very tedious work.
- This is a huge file with too many elements and to make things easier we can press “V” to activate the Move Tool.
- Then after, click on the “Auto-Select” button on its options bar.
- Then, rather than selecting a group, select the “Layer”.
- With these settings, you can now click on any element and its corresponding layer will be brought to you by Photoshop!
- You can also develop your application’s prototype from the mockup. Depending on your app requirements, you could add striking features within the core area, available in this PSD file.
- You can also edit the fonts, design styles, and gradient colors of the layer of the elements.
Note: Don’t resize anything as all the UI elements and bars are set to default standard sizes.
Developing Apps in XCode
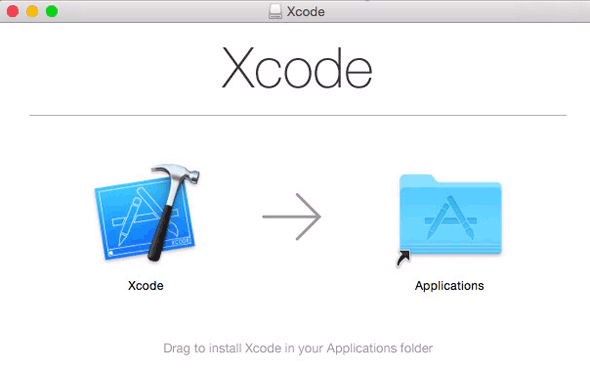
Xcode is the developer tool for iOS devices. If you are using “OS X Lion” then, you can get Xcode and all applicable packages for free from Mac App Store.
- After the completion of installation, launch the Xcode and its welcome screen would come up.
- Now, you can load an older project or select to make a new one. Here, you need to click on “Create a new Xcode project. “
- Then, the template window will show up with some options.
- Under iOS Application, click on “Single View Application” and select “Next”.
- Give the new app a name, i.e. Test.
- Then, in the Company Identifier, type any word such as my_company, pick a directory and click on “Save.”

Xcode will create a file directory and it will get you a new window for working. Besides all the listed files, focus on folder which is named after your application.
Xcode will create a file directory and it will get you a new window for working. Besides all the listed files, focus on folder which is named after your application.
With Xcode, for designing front end elements, you will be available with xib/nib format standard to Mac OS X and iOS apps.
And, it designing of new page view every time. However, if you are creating more views in a single app the number of nib files would be hard to handle hence, a new storyboard file will hold all your nib views under one editor pane.
You can now easily add and remove UI elements and features.
Also, you’ll come across .m (implementation) and .h (header) files under same folder group.
These files include all the Objective-C functions and variables required for your app to run.
It can be better explained how Xcode works with MVC (Model, View, Controller), and also we would need 2 files for each controller.
MVC Architecture
MVC is not a design pattern; it’s a way that structures the web applications. Over the past few years, web applications are broadly adopting the MVC architecture, and thus, people confuse it for a design pattern.
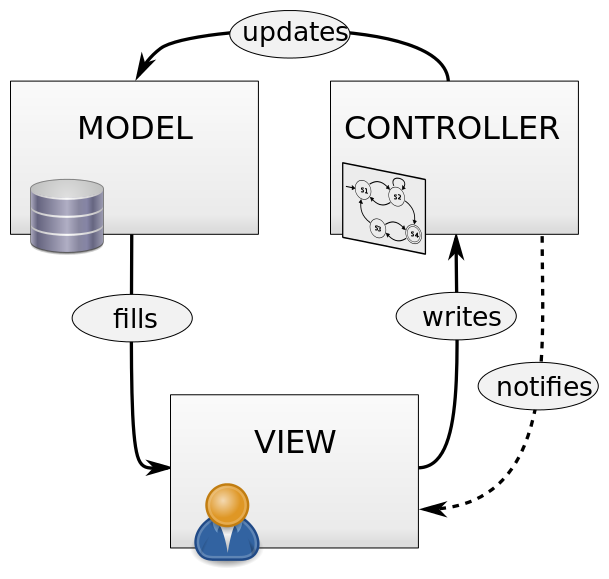
MVC architecture follows a basic idea and its responsibilities are:
- Model: Business logic and handle data
- View: Whenever asked for data, presents the data to the user.
- Controller: Fetch the necessary resources and fulfills user requests.
Each component has a different set of tasks which ensures easy functioning of the whole application along with total modularity.
Model:
The model is simply the data for our application and this data is “modeled” in such a way that it is easy to store, edit, and retrieve. It also explains how rules are applied to the data. For any web application, everything is considered as data that is to be handled easily. This whole thing ultimately represents the concepts that are managed by the web application.
Think for an app, what is a user, or a message? It is just the data that is processed according to some set of rules. So, whenever a request is made from the controller, it contacts the concerned model which fetches some data representation. The model also contains the logic to update the appropriate controller if there is any change in the data of the model.
View:
The view is accountable for representing the data received via the model. For the view, there might be templates where the data can be fitted. And, depending on the requirements there might also be several views per model.
Controller:
The controller is just like a housekeeper of the web application, it performs synchronization between model and view to fulfill user requests. The requests from the user are received as HTTP post or HTTP get request.
For example: To perform any action, the user clicks on any GUI elements and the primary purpose of a controller is to call and synchronize with the model to retrieve the necessary resources required to act. Generally, while receiving the user requests, the controller calls the suitable model for the task.
A web application is always structured by keeping in mind these 3 core components. There may be a prime controller, responsible for receiving all the user requests and then calling the specific controller for specific actions.
Basically, the model holds all the functions and information that you need to display on the screen. And, the fact is that only views can interact with the screen, not the models.
Views are mainly visuals which pull out data through a ViewController.
The Controller is a way to hide your backend data from the user interface.
So, in this way, you can recreate the design multiple times without losing the functionality.
Designing View with Storyboards
Now that we know the technical aspects of an application, we shall design the interface.
Here, we are considering “ the Storyboard” option which you can find under one MainStoryboard_iPhone.storyboard file located somewhere on the left side of the window in the folder group.
Click on the file to open the view.
A new sidebar would appear on the right side of the folder group. This is called Document Outline which is quick preview method to check off all of the views available in this storyboard.
Now we would add a few page elements to our view-controller. W For that we need 2 different elements: Navigation Bar, Tab Bar.
Before you grant access to the Attributes Inspector (View > Utilities > Show Attributes Inspector) located on the right side of the window look out for the Status Bar label.
By default it is set to Inferred which uses the standard iPhone status color.
You can also choose “Black or Translucent Black. “
The Objects Library
You can enable Utilities: View> Utilities>Show Utilities, if it isn’t visible, on the right side of the window. You will find the Object Library at the bottom of that page. Select the drop-down menu with the Objects as the first item of the list.
If not found then, select View > Utilities > Show Object Library.
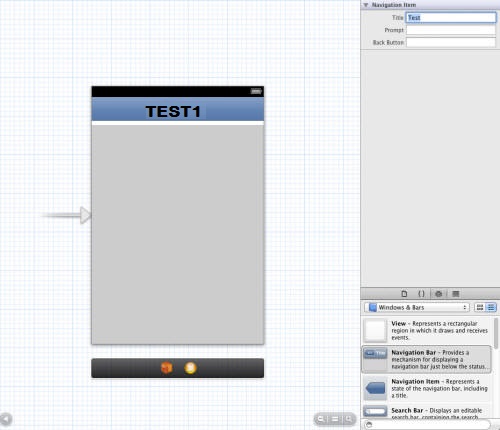
Then, select Windows & Bars and click on Navigation Bar.
Then after, Drag it into the view window and put that into Status Bar with a battery-level icon.
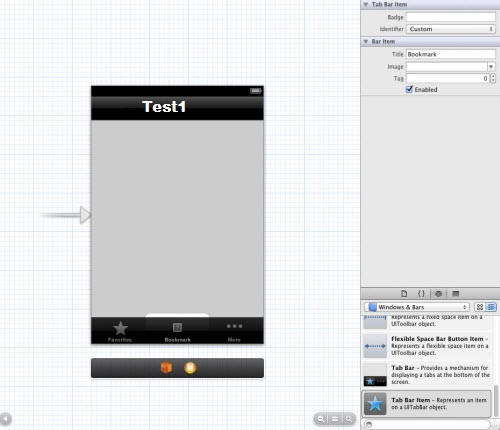
Customize the bar’s title description now and double click on the text which reads Title, and then change it to Test1.
Press Enter to see the change.
Now once again, in the Windows & Bars panel, scroll down to choose Tab Bar; drag it into the view window; drop it at the bottom bar of your app.
You can now add another tab button in the bottom bar. Scroll down to Tab Bar Item and drag it place it in the middle of the two existing Tab Bar buttons.
iOS app development is a vast topic and this was our little guide of “interface building.”
In case, you are looking out for PWA development then, Orion eSloutions has a great reputation in providing exceptional IT services. To know more, check out our services.